
razsmiths
Archives2021
July 2021
August 2021
September 2021
October 2021
November 2021
December 2021
2022
January 2022
February 2022
March 2022
April 2022
May 2022
June 2022
July 2022
August 2022
September 2022
October 2022
November 2022
2023
April 2023
May 2023
October 2023
November 2023
December 2023
2024
February 2024
March 2024
April 2024
May 2024
June 2024
July 2024
August 2024
September 2024
October 2024
November 2024
December 2024
2025
July 2025
August 2025
September 2025
Kids Decorative Paper Straw Christmas Tree Ornaments
The holiday season is the perfect time to get creative with family craft projects. One of the most fun and budget-friendly activities is making Kids Decorative Paper Straw Christmas Tree Ornaments. These ornaments are simple, colourful, and a joy to make with children. Best of all, they create long-lasting keepsakes that you can bring out year after year.
If you’re looking for easy DIY Christmas crafts that kids can enjoy, this step-by-step guide will show you how to make your own festive ornaments with just a few materials.
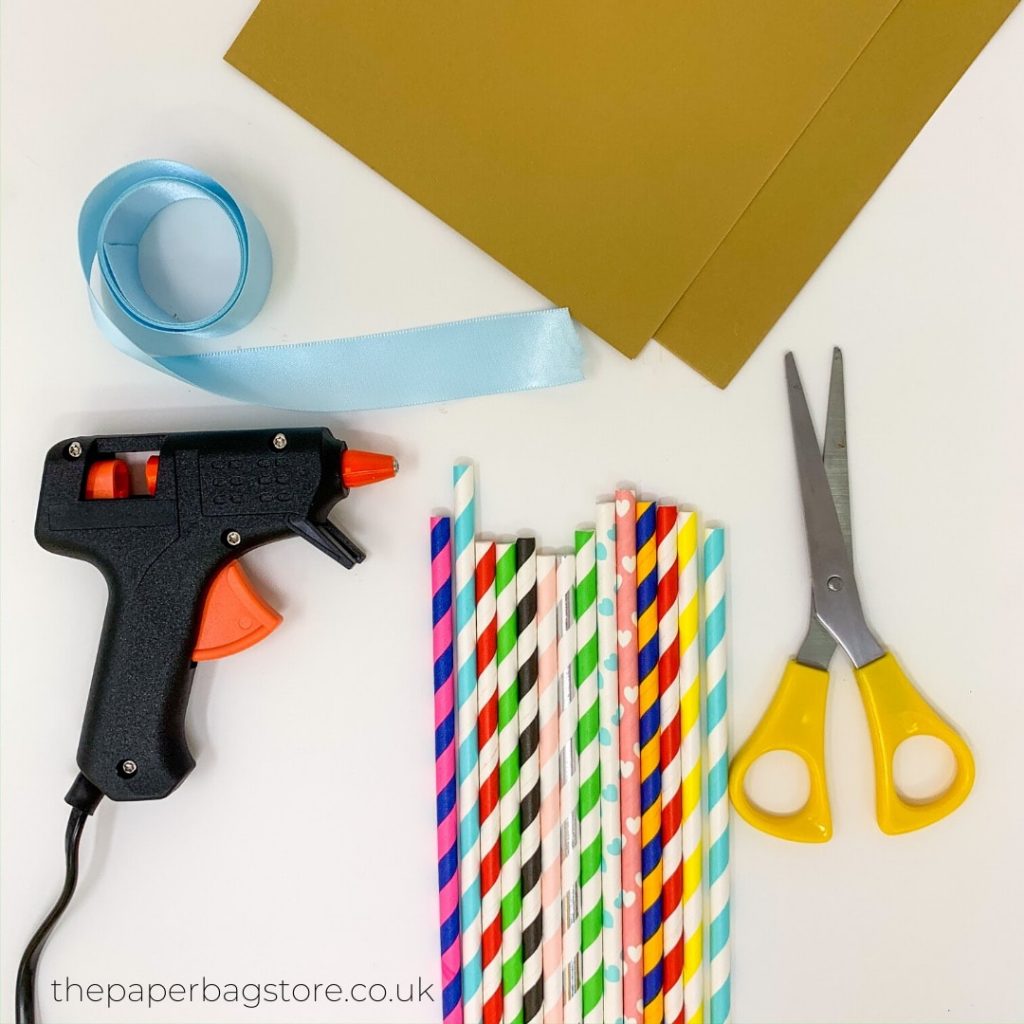
Materials You’ll Need
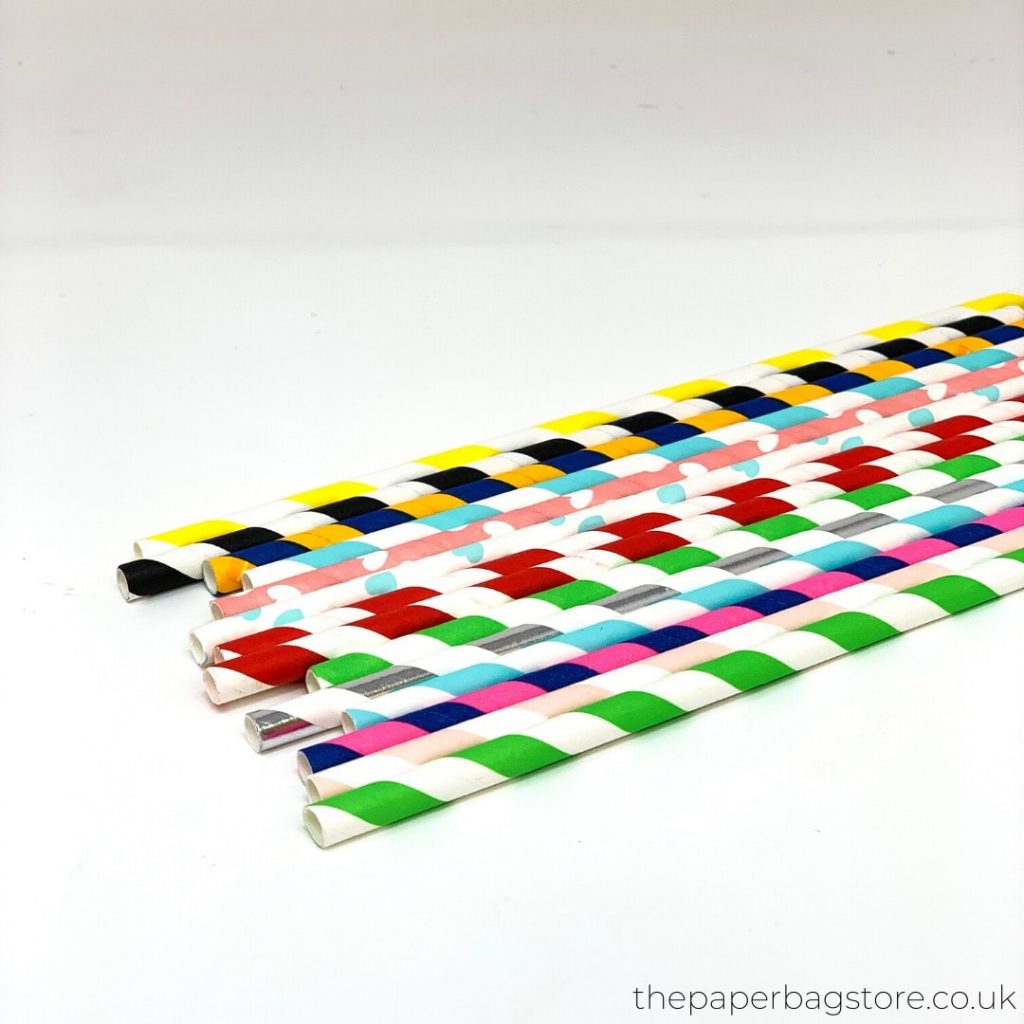
- Decorative paper straws
- Hot glue gun / strong glue
- Card
- Ribbon (browse festive ribbons here)
- Scissors
Choose Christmas-themed paper straws and ribbons for a festive look. You can also explore eco-friendly or patterned options from craft supply shops to add variety.
We picked our favourite Christmas-y paper straws and ribbon from our collection to get started on this fun craft project!
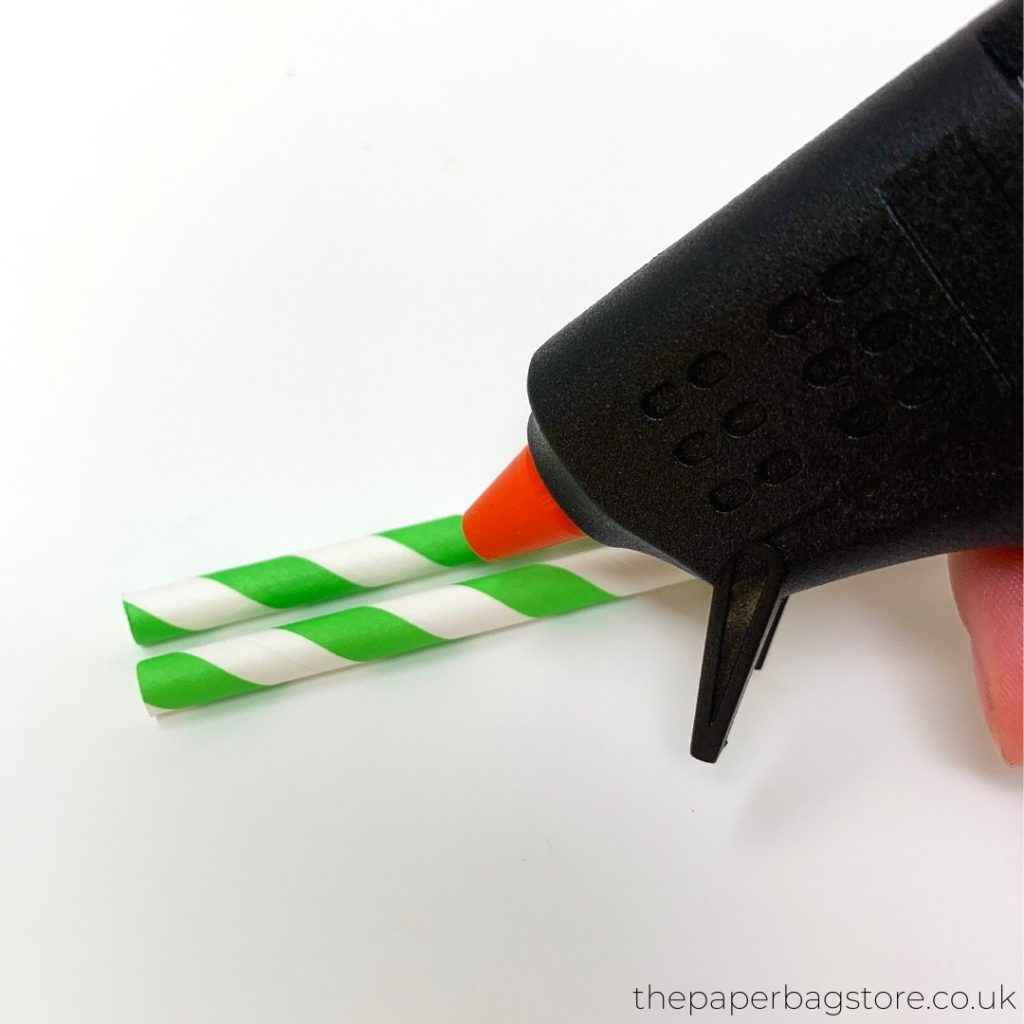
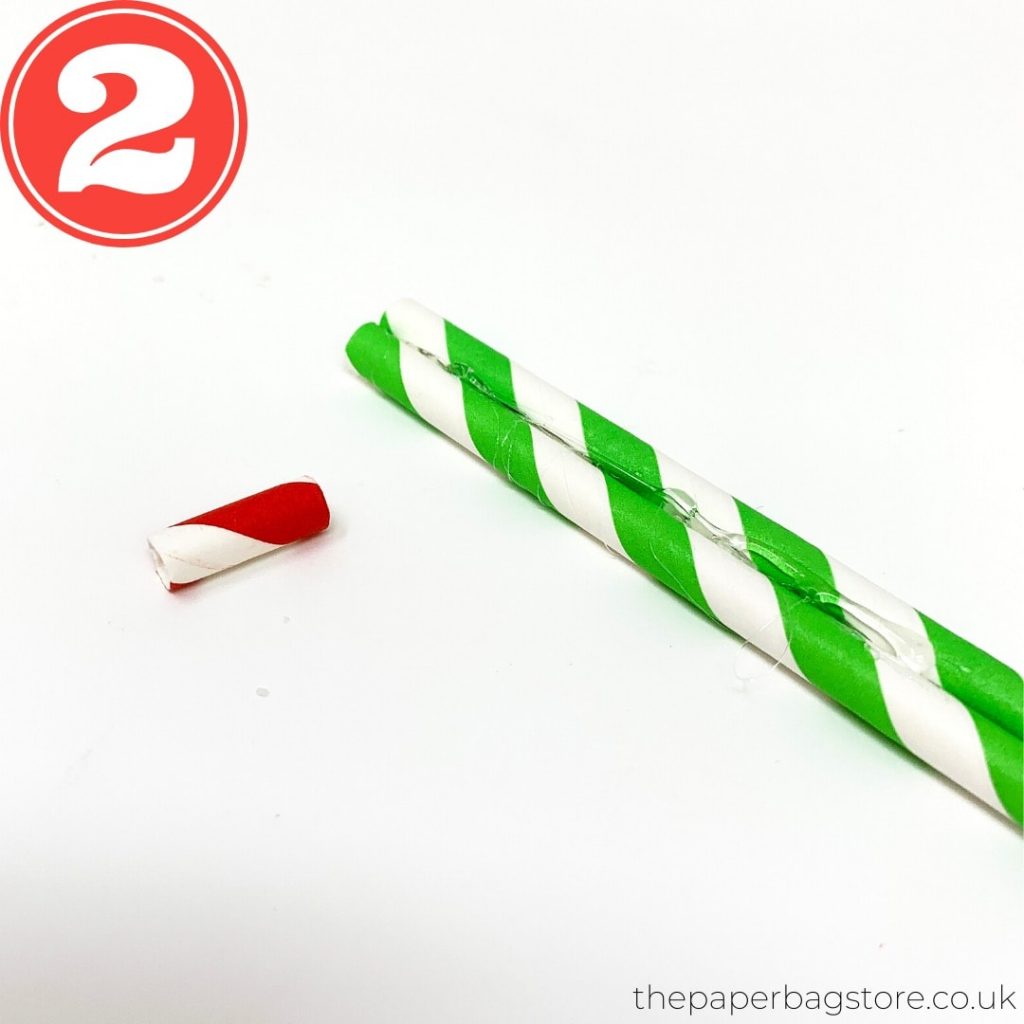
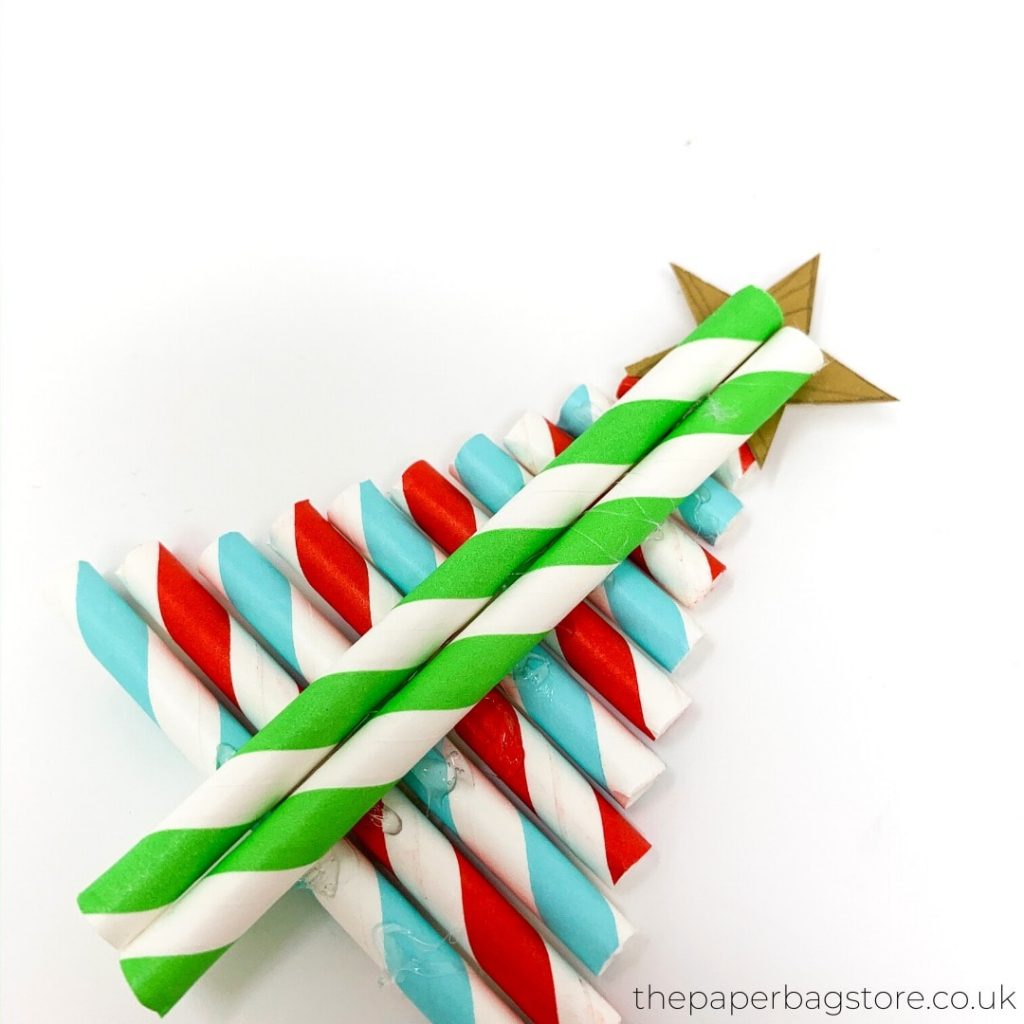
Step 1 – Create the Tree Trunk
Start by forming the tree trunk. Use two paper straws placed side by side. Add a small amount of glue (with parent supervision if little ones are helping) to hold the straws together securely.
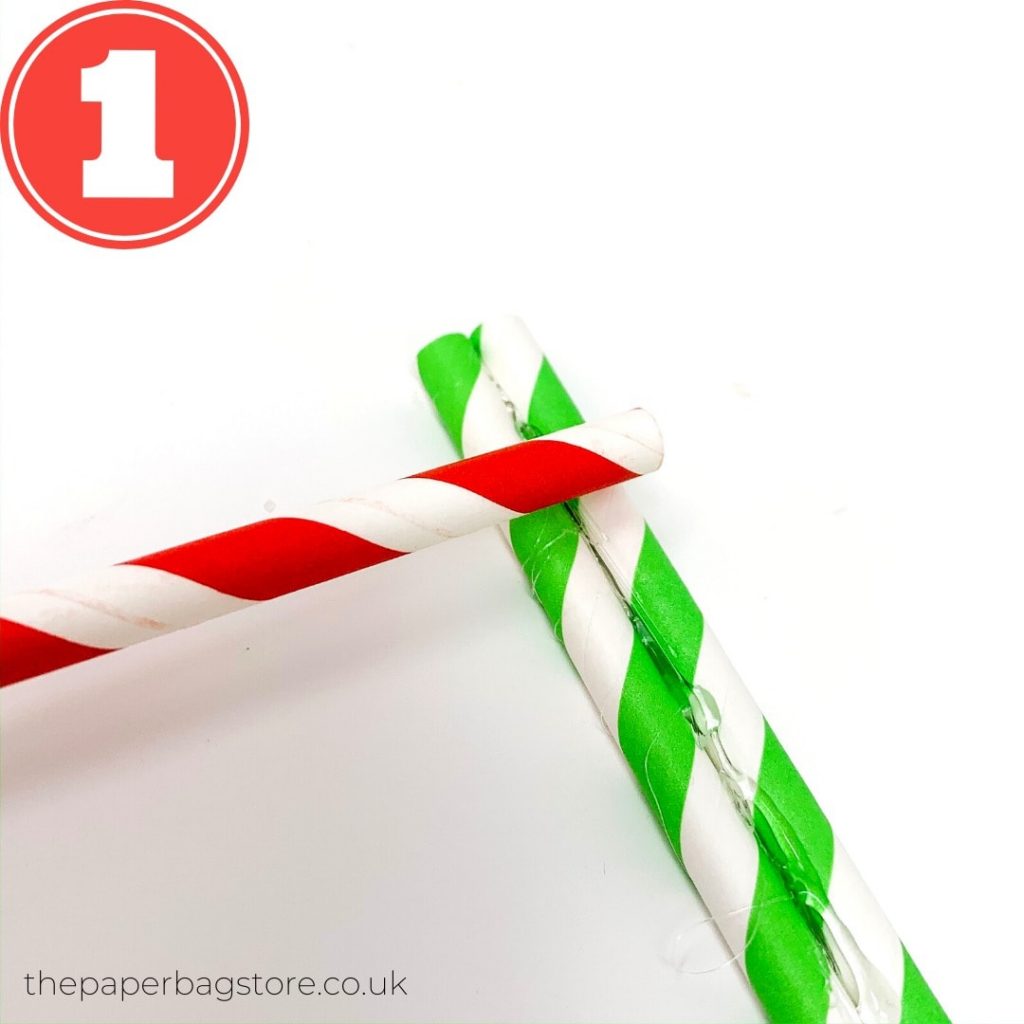
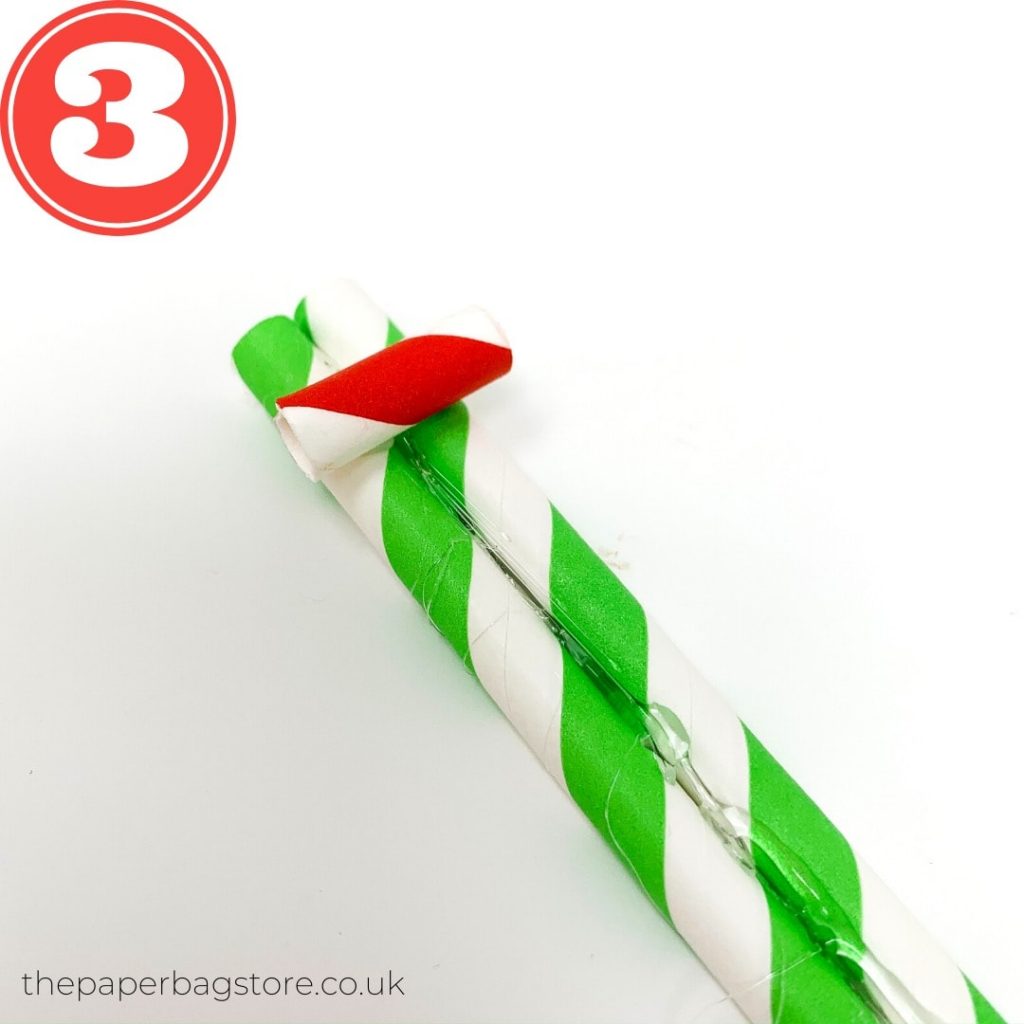
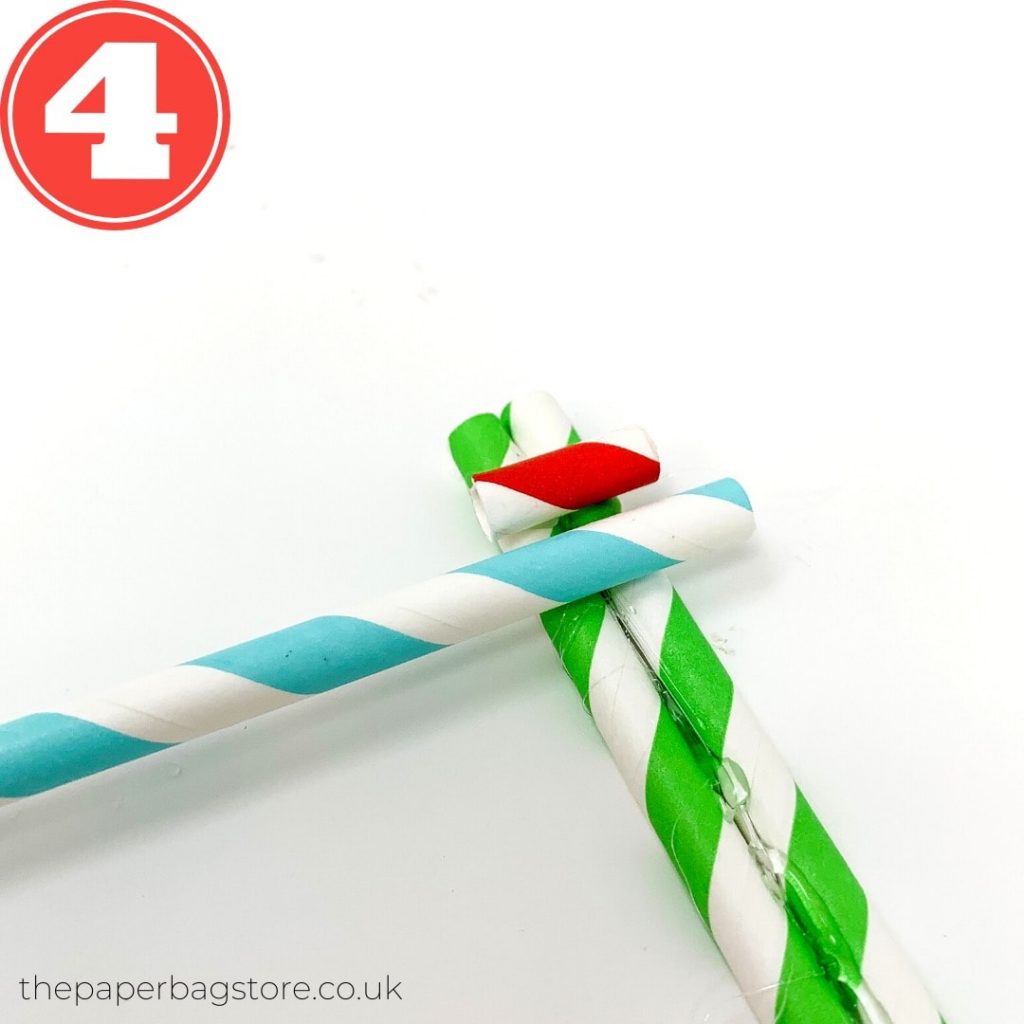
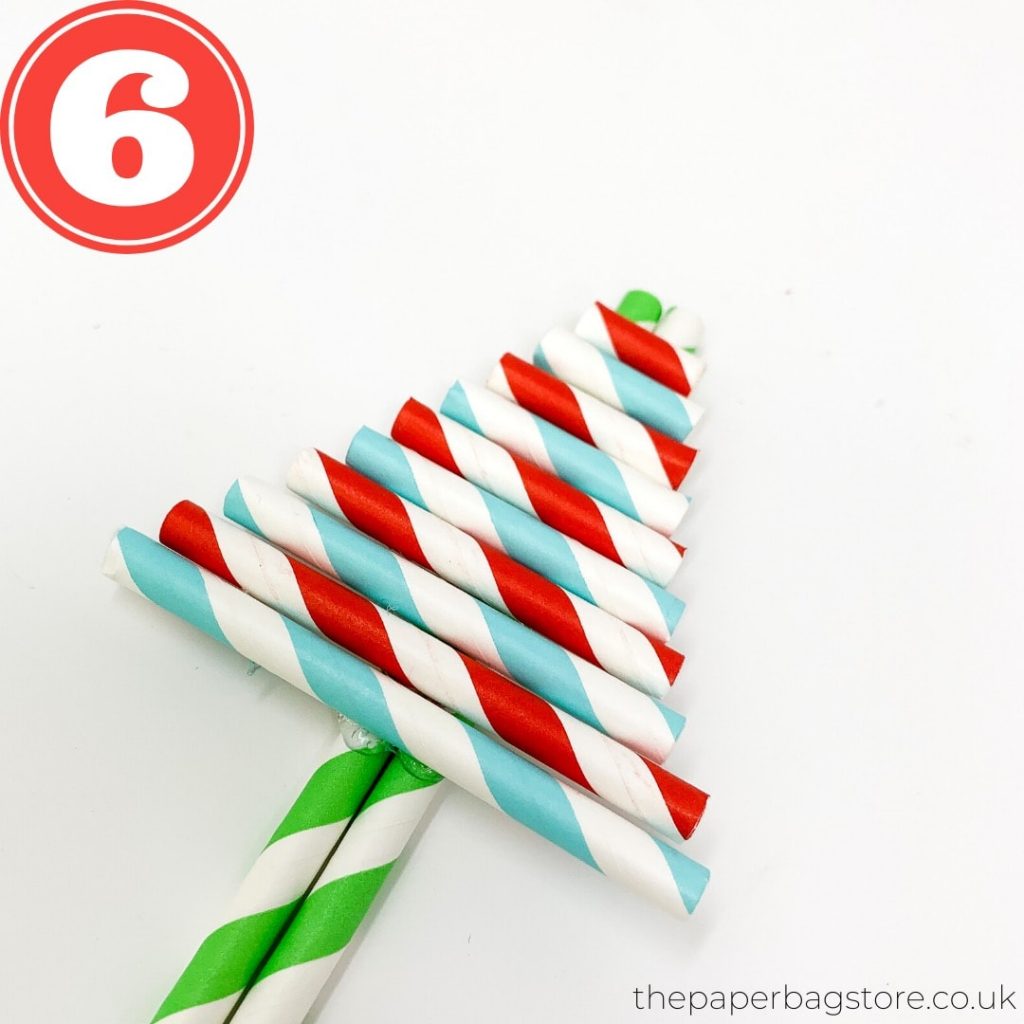
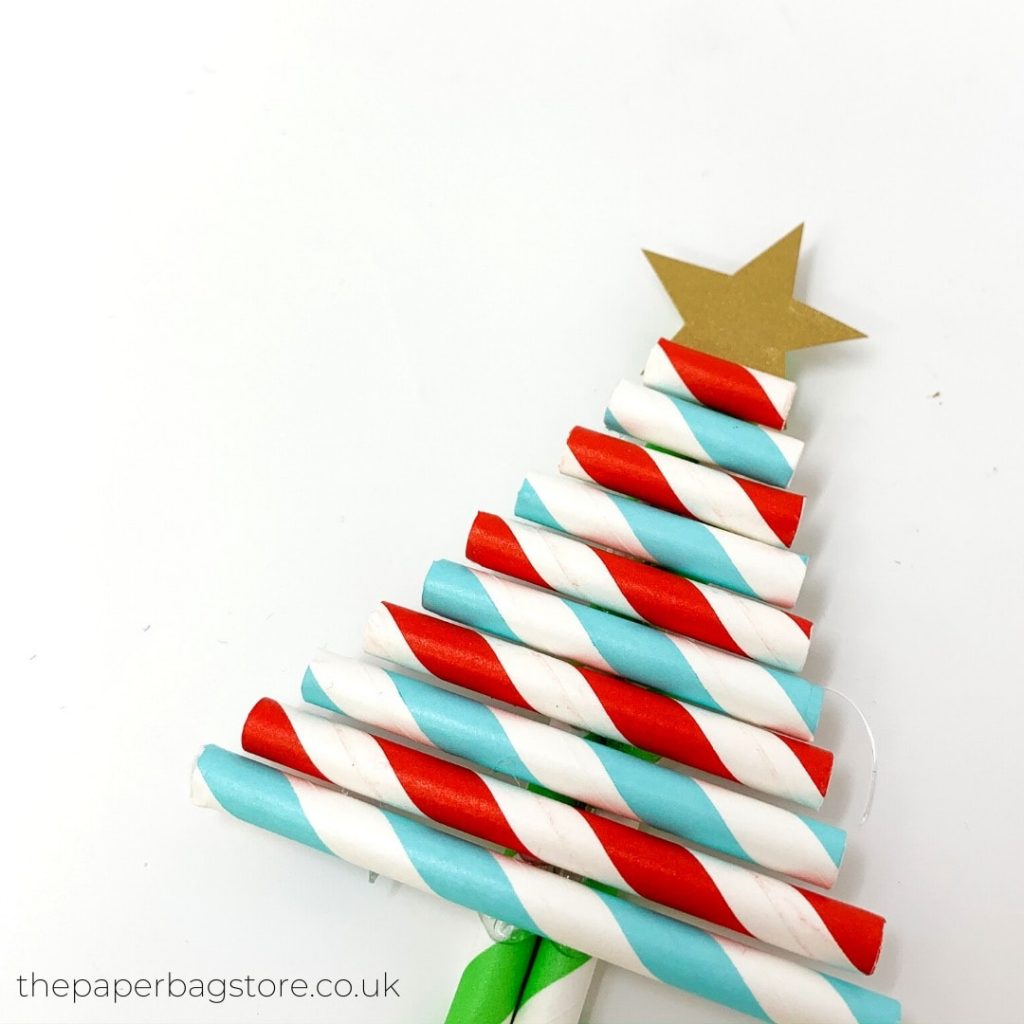
Step 2 – Build Your Christmas Tree
Now it’s time to create your tree branches.
- Begin at the top of the trunk.
- Cut the first straw so it’s about the same width as the trunk.
- Gradually cut each straw a little longer as you work down the tree.
Leave a small space at the top for your star. Glue each straw carefully to the trunk, forming a triangle tree shape.
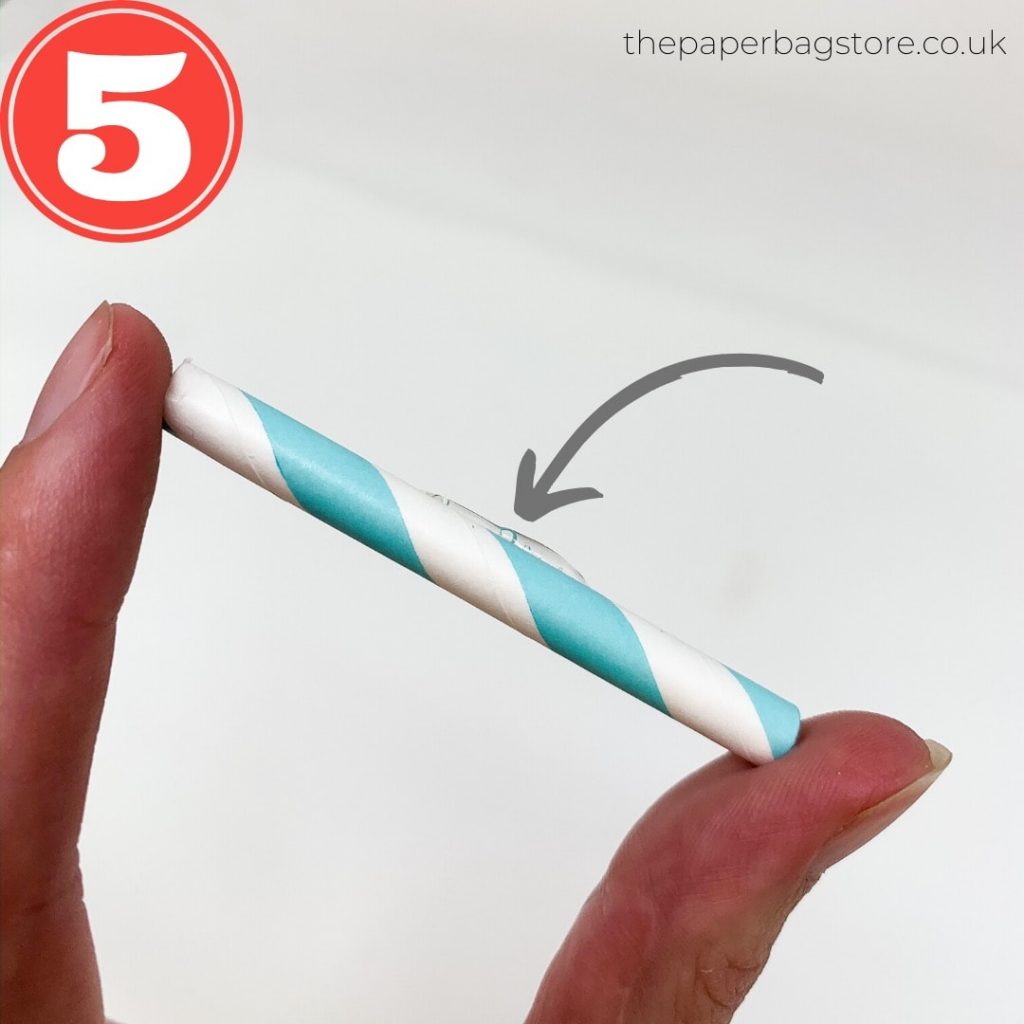
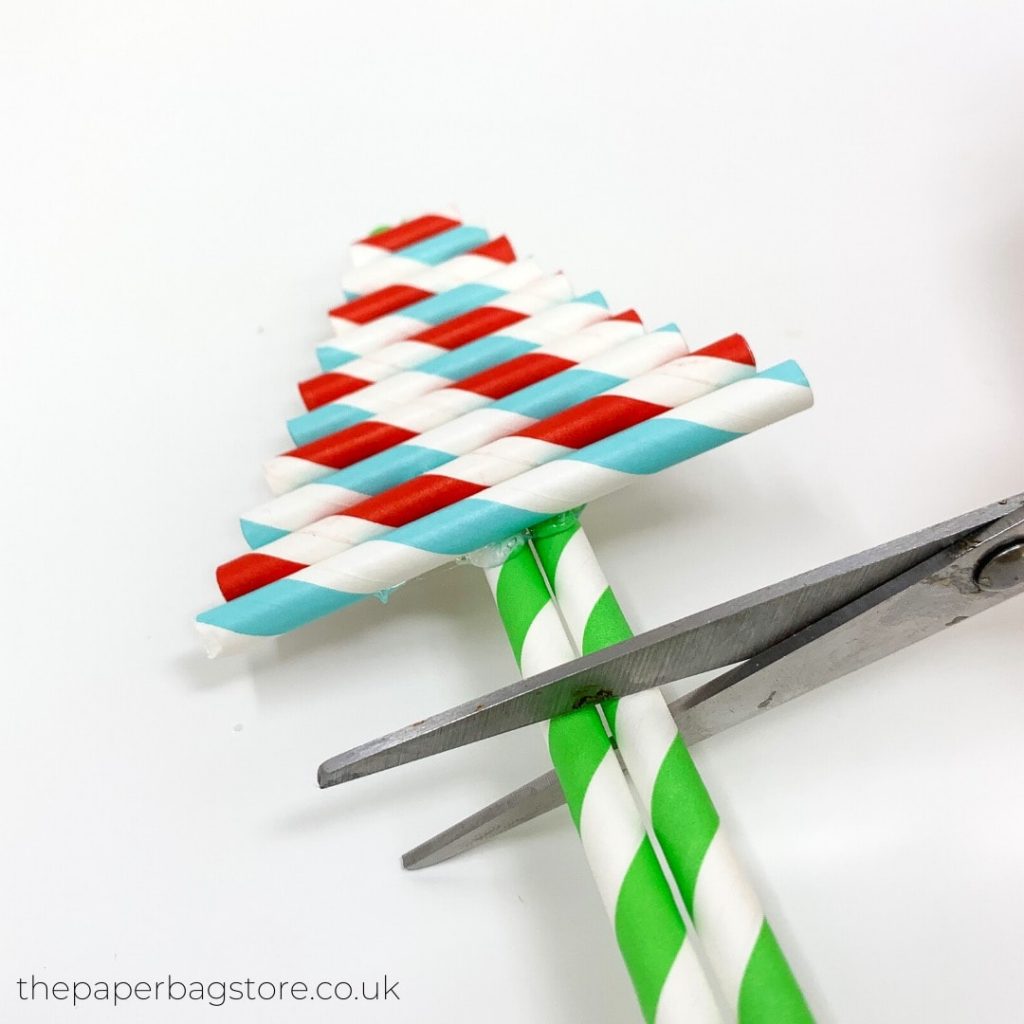
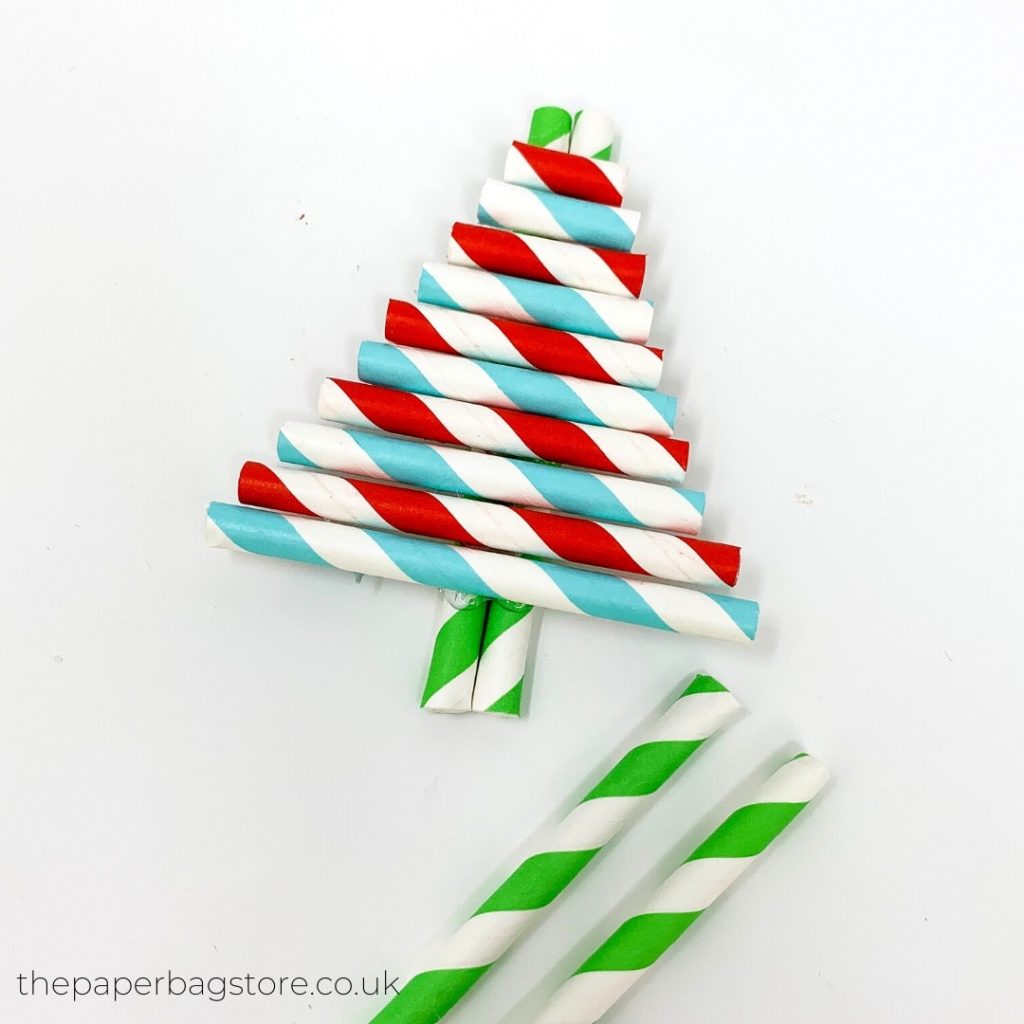
Step 3 – Trim the Tree Trunk
Once your branches are attached, trim any excess length at the bottom of the trunk so it looks neat and balanced.
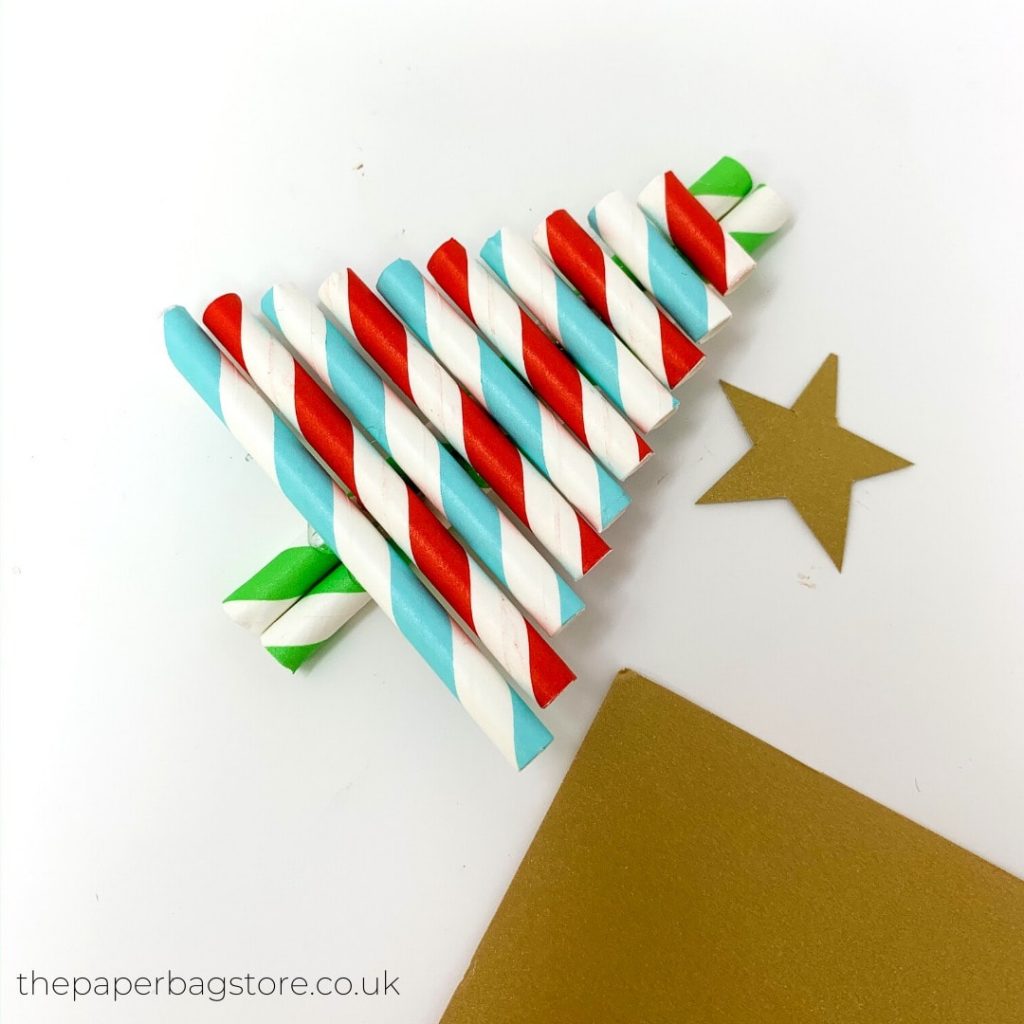
Step 4 – Add the Star
No Christmas tree is complete without a star! Draw a star on card, cut it out, and glue it to the top of your tree. For sparkle, try using glitter card or even metallic stickers.
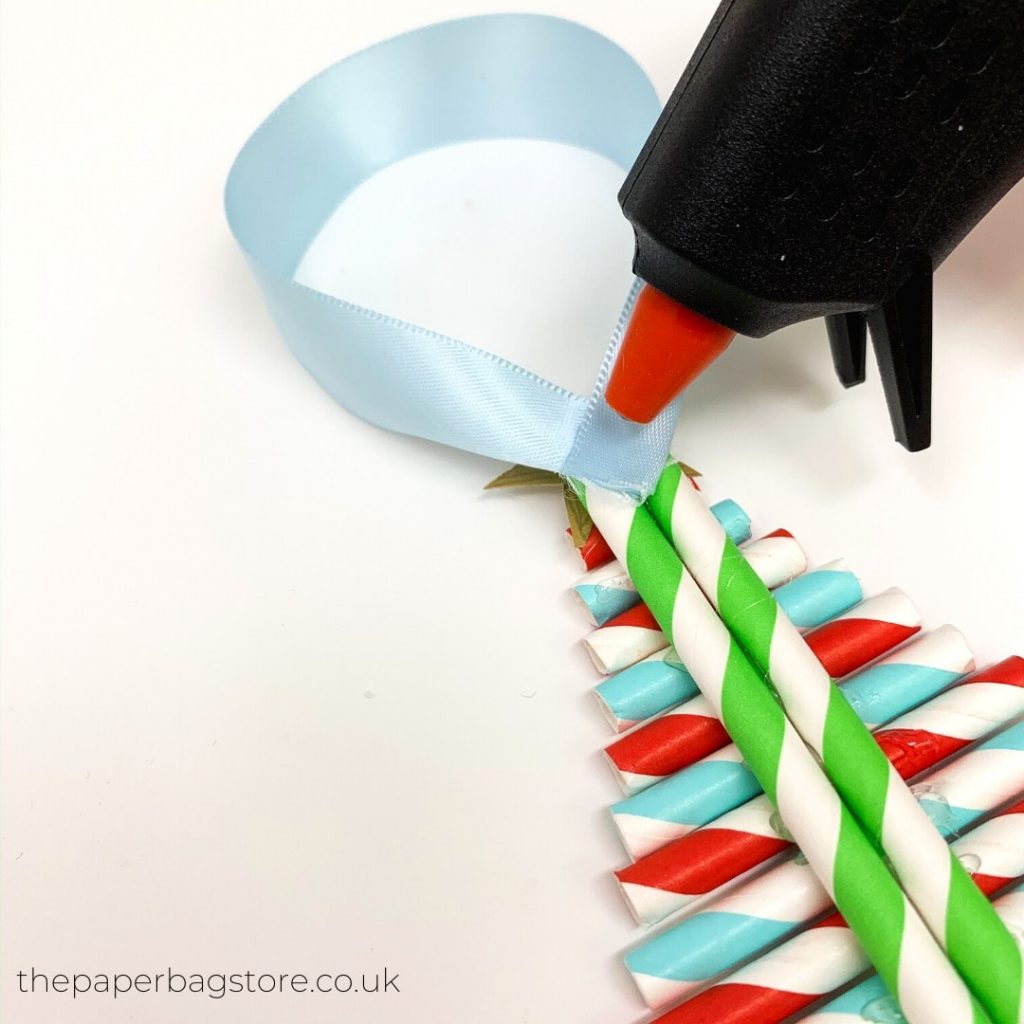
Step 5 – Attach the Ribbon
Finally, cut a small piece of ribbon and glue it to the back of your ornament. This will allow you to hang your tree proudly on your Christmas tree branches. Choose a ribbon that complements your straws for a coordinated look.
Finishing Touches
Your Kids Decorative Paper Straw Christmas Tree Ornaments are now ready to hang! These handmade decorations are cheerful, colourful, and bring a personal touch to your holiday décor.
Crafting together not only creates unique ornaments but also wonderful family memories. If you’d like more festive inspiration, check out DIY Christmas craft ideas and discover other creative projects you can enjoy with children.
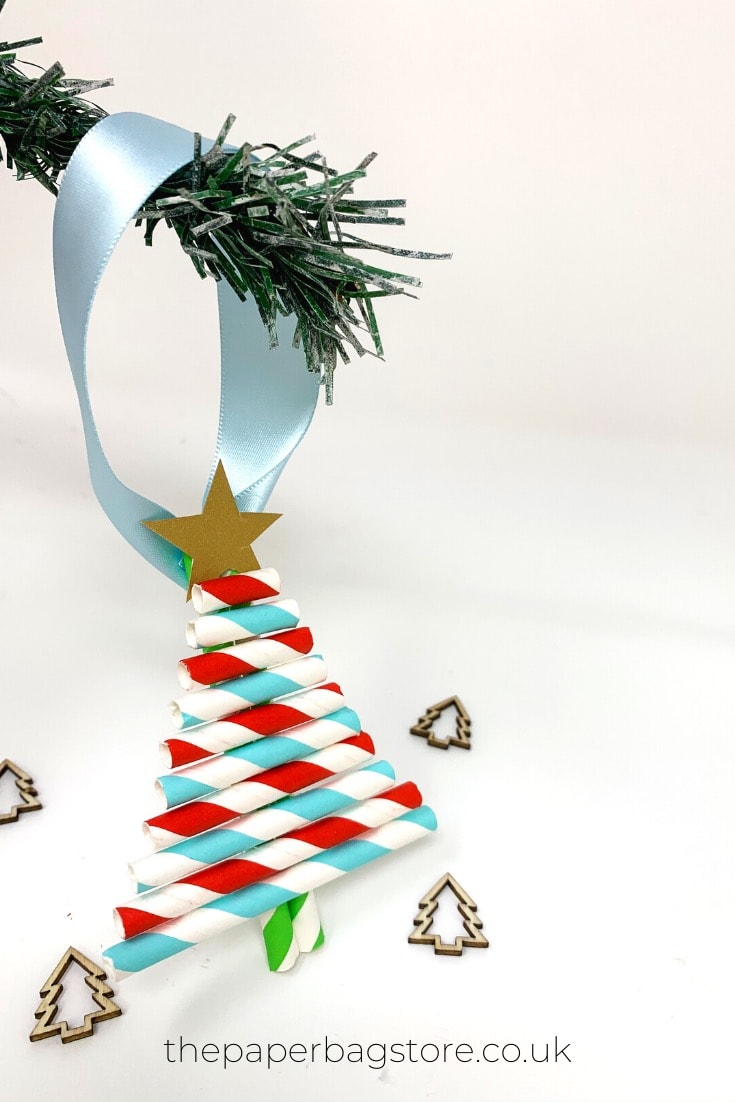
Working on craft projects with your kids are always a great way to have fun together and create beautiful long lasting memories together. And now you’ll have a special keepsake to pull out every year to decorate the tree with!
by razsmiths on 2025-09-23 09:20:03
No comments yet.